Embarking on the journey of hydroponics can be both exciting and a tad overwhelming. If you’re seeking a straightforward, low-maintenance method to grow your favorite greens, the Kratky method might just be your perfect match. This passive hydroponic technique allows you to cultivate plants without the need for pumps, electricity, or constant monitoring. Let’s delve into the essentials of the Kratky method, how to set up your own system, and why this method is so perfectly suited for home gardeners looking to dip their toes into hydroponics.
Understanding the Kratky Method
The Kratky method is a simplified version of hydroponics, ideal for beginners and seasoned gardeners alike who want to avoid the complexities of active systems like deep water culture (DWC) or nutrient film technique (NFT). Developed by Dr. Bernard Kratky at the University of Hawaii, this method requires minimal setup and maintenance, making it accessible even for those who are new to the world of hydroponics.
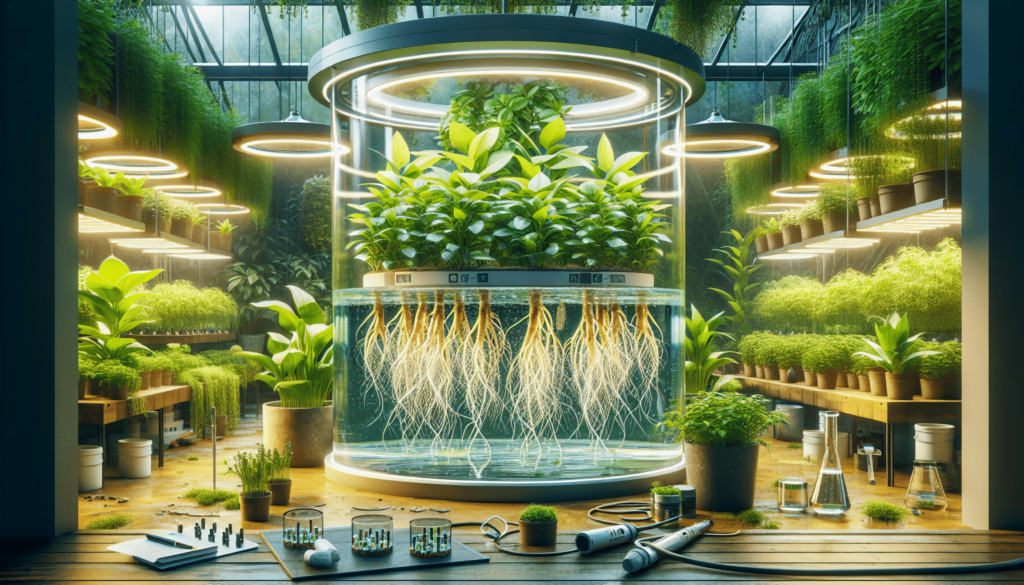
In a Kratky system, plants are suspended above a reservoir filled with a nutrient-rich solution. As the plants absorb water and nutrients, the solution level lowers, creating an air gap that allows roots to access oxygen. This process creates a natural balance between nutrient uptake and oxygenation, allowing plants to grow healthily without the need for pumps, electricity, or constant human intervention.
The concept behind the Kratky method is elegantly simple: it utilizes the natural ebb and flow of water to create a system where plants can thrive with very little input from the grower. As a result, it is particularly well-suited for those who want to experiment with hydroponics but may be intimidated by the requirements of more advanced systems.
Why Choose the Kratky Method?
There are several reasons why the Kratky method is a favorite among home gardeners:
- Simplicity: The Kratky method is as close to a “set it and forget it” system as you can get in hydroponics. With no moving parts, electrical components, or complex irrigation schedules, it’s easy for beginners to get started without much technical know-how.
- Cost-Effective: Because it requires only basic materials—such as a container, net pots, and a nutrient solution—the Kratky method is a highly affordable way to get into hydroponic gardening. There is no need to invest in expensive pumps, aerators, or controllers.
- Water Efficiency: In traditional soil-based gardening, much of the water is lost through evaporation and runoff. The Kratky method, however, uses a closed reservoir, ensuring that the majority of the water goes directly to the plants. This makes it an environmentally friendly choice, particularly in areas where water conservation is a concern.
- Versatility: This method works well for a variety of plants. While leafy greens like lettuce, spinach, and herbs such as basil and mint are particularly well-suited for the Kratky method, other plants, including some fruiting crops, can also be grown effectively with a little tweaking.
How Does the Kratky Method Work?
At its core, the Kratky method leverages a simple principle: as plants take in water and nutrients, the water level in the reservoir drops, creating an air gap that allows the roots to access oxygen. This air gap is crucial, as plant roots need both oxygen and water to thrive.
- Nutrient Solution: The nutrient solution used in the Kratky method provides all the essential nutrients that plants need to grow. This is typically a mix of macronutrients (nitrogen, phosphorus, potassium) and micronutrients (calcium, magnesium, iron, etc.). The solution is adjusted to the correct pH to ensure optimal nutrient uptake.
- Air Gap for Oxygenation: As the plants grow, their roots will extend into the nutrient solution. Over time, the water level will drop, creating an air gap between the lid of the container and the water level. This air gap is what allows the roots to absorb oxygen, which is critical for plant health.
- Growth Stages: During the early stages of growth, plant roots are fully submerged in the nutrient solution. As they mature, they grow longer and eventually reach the air gap, ensuring that the plant can take in both water and oxygen simultaneously. This natural process eliminates the need for aerators or circulation pumps that are typically used in other hydroponic systems.
Step-by-Step Guide to Setting Up Your Kratky Hydroponic System
Setting up a Kratky system is incredibly straightforward, making it an excellent choice for beginners or anyone looking for a low-maintenance way to grow plants at home. Below, we’ll walk you through each step in detail.
Materials Needed
- Container: The container you use for the nutrient reservoir can be anything from a plastic bucket to a mason jar, depending on the size and number of plants you want to grow. Ensure that the container is opaque to prevent light from reaching the nutrient solution, which can encourage algae growth.
- Net Pots: These are small pots that allow the plant roots to dangle freely into the nutrient solution. They are placed in the lid of the container, allowing the roots to access the nutrient solution below.
- Growing Medium: The growing medium is what holds the plants in place within the net pots. Common growing media include clay pellets, rockwool, or coco coir. These materials provide support for the plant while allowing roots to grow freely.
- Nutrient Solution: You’ll need a hydroponic nutrient solution to provide your plants with all the essential nutrients. You can buy pre-mixed solutions or create your own using hydroponic nutrients from a gardening store.
- pH Testing Kit: Maintaining the proper pH is crucial in hydroponic systems. A pH testing kit will help you ensure that your nutrient solution stays within the optimal range for your plants (typically between 5.5 and 6.5).
-
Product on sale
%27%20fill-opacity%3D%27.5%27%3E%3Cellipse%20fill%3D%22%23151515%22%20fill-opacity%3D%22.5%22%20rx%3D%221%22%20ry%3D%221%22%20transform%3D%22rotate(141.6%2032.7%20107.7)%20scale(77.25986%20130.61547)%22%2F%3E%3Cpath%20fill%3D%22%23fff%22%20fill-opacity%3D%22.5%22%20d%3D%22M170.1-100L378.5%2035.5l-67%20103.2L103%203.3z%22%2F%3E%3Cellipse%20fill%3D%22%23fefefe%22%20fill-opacity%3D%22.5%22%20rx%3D%221%22%20ry%3D%221%22%20transform%3D%22rotate(19.6%20-608.5%20962.7)%20scale(39.63655%20238.09789)%22%2F%3E%3Cellipse%20fill%3D%22%23fff%22%20fill-opacity%3D%22.5%22%20rx%3D%221%22%20ry%3D%221%22%20transform%3D%22rotate(41.2%20-354.2%20133.9)%20scale(73.67456%2042.13877)%22%2F%3E%3C%2Fg%3E%3C%2Fsvg%3E) Set of 5 Packs, 4-Site Viagrow Net Pot with Mesh Bucket Lid and 3 inch Net Pots (Total of 4 Pots)Original price was: $32.99.$29.90Current price is: $29.90.
Set of 5 Packs, 4-Site Viagrow Net Pot with Mesh Bucket Lid and 3 inch Net Pots (Total of 4 Pots)Original price was: $32.99.$29.90Current price is: $29.90. -
 Hydroponic Starter Kit: 72 Rockwool Cubes with Net Pots, 72 Plugs, 50 Net Cups, and Self-Watering Cotton Wick Cord$1.02
 -
%27%20fill-opacity%3D%27.5%27%3E%3Cellipse%20fill%3D%22%23fff%22%20fill-opacity%3D%22.5%22%20rx%3D%221%22%20ry%3D%221%22%20transform%3D%22matrix(-40.35835%20-103.8874%2059.21624%20-23.00442%20129%207.2)%22%2F%3E%3Cellipse%20fill%3D%22%231b1a1d%22%20fill-opacity%3D%22.5%22%20rx%3D%221%22%20ry%3D%221%22%20transform%3D%22matrix(-46.38106%202.0369%20-3.74012%20-85.16378%2060.6%20180.8)%22%2F%3E%3Cellipse%20fill%3D%22%23242326%22%20fill-opacity%3D%22.5%22%20rx%3D%221%22%20ry%3D%221%22%20transform%3D%22matrix(9.6495%20-93.114%2041.3539%204.28554%20234%20164)%22%2F%3E%3Cellipse%20fill%3D%22%23fff%22%20fill-opacity%3D%22.5%22%20rx%3D%221%22%20ry%3D%221%22%20transform%3D%22matrix(55.084%209.67798%20-13.5835%2077.313%20143.9%20299.4)%22%2F%3E%3C%2Fg%3E%3C%2Fsvg%3E) 5 Gallon Deep Water Culture Hydroponic Grow System by Mars Hydro with Air Pump, Air Hose, Air Stone, Buckets, and Drip Kit$109.99
5 Gallon Deep Water Culture Hydroponic Grow System by Mars Hydro with Air Pump, Air Hose, Air Stone, Buckets, and Drip Kit$109.99
Step-by-Step Assembly
- Prepare the Container: Fill the container with water, then add the appropriate amount of hydroponic nutrient solution. The container should be filled so that the bottom of the net pots will be submerged in the solution.
- Adjust pH: Use a pH testing kit to measure the pH of your nutrient solution. Adjust as needed to maintain a pH between 5.5 and 6.5, which is the ideal range for most hydroponic plants.
- Insert Net Pots: Place your plants or seedlings into the net pots. Use the growing medium to support the plants. Make sure that the bottom of each net pot is in contact with the nutrient solution to ensure the roots can absorb water.
- Cover and Monitor: Place the lid with net pots onto your container, ensuring that the reservoir is covered and no light can reach the nutrient solution. Over time, the nutrient level will drop, and roots will naturally grow into the solution and the air gap.
- Maintenance: Check the water level and nutrient concentration every few weeks. If the water level gets too low, simply add more nutrient solution, but be sure to leave some air gap for root oxygenation.
The Best Plants for the Kratky Method
The Kratky method is particularly well-suited for growing leafy greens and herbs due to their fast growth rates and relatively low nutrient requirements. Here are some of the best plant varieties to try:
- Lettuce: One of the most popular choices for the Kratky method, lettuce grows quickly and requires minimal nutrients. Varieties like butterhead, romaine, and leaf lettuce work particularly well.
- Spinach: Another leafy green that thrives in a Kratky setup. Spinach grows best in cooler temperatures and can be harvested multiple times during its growing cycle.
- Herbs: Basil, mint, cilantro, and parsley are all excellent choices for the Kratky method. They grow quickly and require little maintenance, making them perfect for beginners.
- Pak Choi: This Asian green grows exceptionally well in passive hydroponic systems and adds a tasty, crunchy addition to your garden.
If you want to explore more plant options, check out our detailed guide on the best plants for Kratky hydroponics. This guide provides specific tips on what conditions each plant thrives in and how to achieve optimal growth.
-
%27%20fill-opacity%3D%27.5%27%3E%3Cellipse%20fill%3D%22%23ac929b%22%20fill-opacity%3D%22.5%22%20rx%3D%221%22%20ry%3D%221%22%20transform%3D%22matrix(4.11673%20-70.4614%20298.3194%2017.42943%20151.2%20249.2)%22%2F%3E%3Cellipse%20fill%3D%22%2300462c%22%20fill-opacity%3D%22.5%22%20rx%3D%221%22%20ry%3D%221%22%20transform%3D%22rotate(116.9%2026%2075)%20scale(92.5453%20152.75787)%22%2F%3E%3Cellipse%20fill%3D%22%23583642%22%20fill-opacity%3D%22.5%22%20rx%3D%221%22%20ry%3D%221%22%20transform%3D%22matrix(-9.61313%20-31.64053%2078.73987%20-23.923%20195.4%20159.2)%22%2F%3E%3Cellipse%20fill%3D%22%23518574%22%20fill-opacity%3D%22.5%22%20rx%3D%221%22%20ry%3D%221%22%20transform%3D%22matrix(58.72561%2036.12824%20-12.89276%2020.95688%2083.7%20152.3)%22%2F%3E%3C%2Fg%3E%3C%2Fsvg%3E) Bloomsdale Spinach Seeds for Planting: Premium Heirloom Non-GMO Variety Ideal for Indoor, Outdoor, and Hydroponic Gardening, from Gardeners Basics$4.85
Bloomsdale Spinach Seeds for Planting: Premium Heirloom Non-GMO Variety Ideal for Indoor, Outdoor, and Hydroponic Gardening, from Gardeners Basics$4.85 -
%27%20fill-opacity%3D%27.5%27%3E%3Cellipse%20fill%3D%22%23feffff%22%20fill-opacity%3D%22.5%22%20rx%3D%221%22%20ry%3D%221%22%20transform%3D%22rotate(178.6%20141.3%2027)%20scale(44.8102%2084.48523)%22%2F%3E%3Cellipse%20fill%3D%22%23feffff%22%20fill-opacity%3D%22.5%22%20rx%3D%221%22%20ry%3D%221%22%20transform%3D%22matrix(54.52988%202.1255%20-3.08106%2079.04488%2013.7%2052.8)%22%2F%3E%3Cellipse%20fill%3D%22%23647220%22%20fill-opacity%3D%22.5%22%20rx%3D%221%22%20ry%3D%221%22%20transform%3D%22rotate(55.9%20-113.7%20240)%20scale(100.9967%20109.69557)%22%2F%3E%3Cellipse%20fill%3D%22%23f4f5ff%22%20fill-opacity%3D%22.5%22%20rx%3D%221%22%20ry%3D%221%22%20transform%3D%22matrix(.20381%20-35.99557%2070.9608%20.4018%20295%20289.8)%22%2F%3E%3C%2Fg%3E%3C%2Fsvg%3E) Assorted Lettuce Seeds Pack – Non-GMO Heirloom for Hydroponic, Aerogarden, Indoor & Outdoor Gardening. Includes 3800+ Seeds of Bibb, Romaine, Iceberg, and More Varieties by…$179,917.99
Assorted Lettuce Seeds Pack – Non-GMO Heirloom for Hydroponic, Aerogarden, Indoor & Outdoor Gardening. Includes 3800+ Seeds of Bibb, Romaine, Iceberg, and More Varieties by…$179,917.99 -
 Complete Collection of 40 Seeds for Vegetables and Herbs, Suitable for Indoor and Outdoor Planting – Ideal for Hydroponic Gardens – Includes Heirloom and Non-GMO Varieties of…$1.02
Nutrient Management in the Kratky System
One of the key aspects of successful hydroponics is nutrient management. The Kratky method may be passive, but keeping your plants fed is still essential for their growth and health. Here’s what you need to know:
Choosing the Right Nutrients
Hydroponic nutrient solutions come in a variety of formulations, and choosing the right one is crucial for the health of your plants. You need to ensure that your solution contains both macronutrients (such as nitrogen, phosphorus, and potassium) and micronutrients (such as calcium, magnesium, and iron).
Using a pre-mixed hydroponic nutrient solution is the easiest way to get started, but you can also mix your own. Be sure to adjust the nutrients based on the type of plants you are growing; leafy greens, for example, need more nitrogen, while fruiting plants need more phosphorus.
For an in-depth discussion on selecting nutrients, read our article on selecting the ideal nutrients for your Kratky method hydroponics system.
Monitoring pH Levels
Maintaining the proper pH in your nutrient solution is crucial for nutrient uptake. Most plants grow best with a pH level between 5.5 and 6.5. Use a pH testing kit regularly to monitor the pH, and adjust as needed with pH up or down solutions.
Common Issues and Troubleshooting
While the Kratky method is relatively low maintenance, there are some common issues that gardeners may encounter. Here are a few problems to watch for and how to address them:
- Algae Growth: If light penetrates the container, it can encourage algae to grow in the nutrient solution. To prevent this, ensure that your container is opaque, or cover it with foil or black plastic to block any light.
- Nutrient Deficiencies: If your plants show signs of nutrient deficiencies (such as yellowing leaves or stunted growth), check the pH and nutrient concentration of your solution. Adjust as needed to ensure that the plants are getting all the nutrients they require.
- Root Rot: This can occur if the roots are sitting in stagnant water for too long without adequate oxygen. To prevent root rot, make sure there is always an air gap between the water and the base of the plant. If necessary, add an air stone to the reservoir to improve oxygenation.
If you need more specific tips on troubleshooting, our article on troubleshooting common issues in Kratky hydroponics might come in handy, especially when dealing with power-related concerns.

Advanced Techniques to Enhance the Kratky Method
Once you’ve got the basics of the Kratky method down, you may want to experiment with some advanced techniques to increase your yields and enhance the system’s efficiency.
Adding Aeration for Faster Growth
While the traditional Kratky method doesn’t use pumps or aerators, adding an air stone to your setup can enhance plant growth by providing more oxygen to the roots. This is especially useful for larger plants or during hot weather when oxygen levels in the water can become depleted more quickly.
Using Larger Reservoirs for Bigger Plants
The Kratky method works best with small to medium-sized plants, but it can be adapted for larger ones by using bigger reservoirs. The larger the reservoir, the more nutrients and water will be available, which can sustain bigger plants like tomatoes or cucumbers. Be sure to adjust the nutrient solution accordingly to support larger growth.
Implementing a Nutrient Schedule
To optimize growth, you can create a nutrient schedule to adjust the concentration of your solution based on the plant’s growth stage. Seedlings require less nutrient concentration compared to mature plants, so by adjusting your solution at different times, you can ensure your plants get what they need without risking nutrient burn.
Expanding Your Hydroponic Garden
The beauty of the Kratky method is that it can be scaled up or down, depending on your space and interest. Here are some ways to expand your hydroponic garden once you’re comfortable with the basics:
- Vertical Systems: By using stackable containers, you can create a vertical Kratky system that allows you to grow more plants in a smaller footprint. This is perfect for those with limited space.
- Commercial Adaptation: If you’re interested in scaling up to a commercial level, the Kratky method can be adapted with larger reservoirs and more plants per container. It’s an excellent way to provide fresh produce to your local community without a significant upfront investment in technology.
- Experiment with Other Hydroponic Methods: After mastering the Kratky method, you might want to explore more advanced hydroponic systems, such as deep water culture (DWC) or nutrient film technique (NFT). These systems require a bit more infrastructure, but they can produce faster growth and higher yields. For more information, read our article comparing DWC vs. Kratky: A Comparative Look at Hydroponic Techniques.
Conclusion
The Kratky method offers a simple and efficient way to dive into hydroponic gardening. Its passive nature makes it perfect for those looking to grow fresh produce at home without the complexities of traditional hydroponic systems. By starting with this method, you can enjoy the benefits of hydroponics and gradually expand your gardening expertise.
Whether you’re growing herbs for your kitchen or creating a self-sustaining vegetable garden, the Kratky method provides a fantastic starting point. Not only does it offer a more efficient way to grow plants, but it also brings a deeper connection to how food is produced—right from the comfort of your own home.
Ready to get started? Share your Kratky method experiences with us, and let’s grow together! Don’t forget to check out our related articles on hydroponic systems and plant care to keep your green thumb thriving.
Forum
Got something to share or a question to ask? Jump in and start a conversation! Whether it’s tips, advice, or just sharing your experiences, we’d love to hear from you. Don’t be shy—your input could inspire or help someone else!- This forum has 1 topic, and was last updated 10 months, 2 weeks ago by .
- Topic
- Voices
- Last Post
- You must be logged in to create new topics.


